| Peter Lanczak |
 |
Koni
Panorama
constructed by Paul-Victor Patrick, France, 2003 © |
 Cameras |
| Koni
Panorama
© (build in 2003) |
   (click to enlarge) |
| First pictures with this camera, taken in Paris May 2003 |
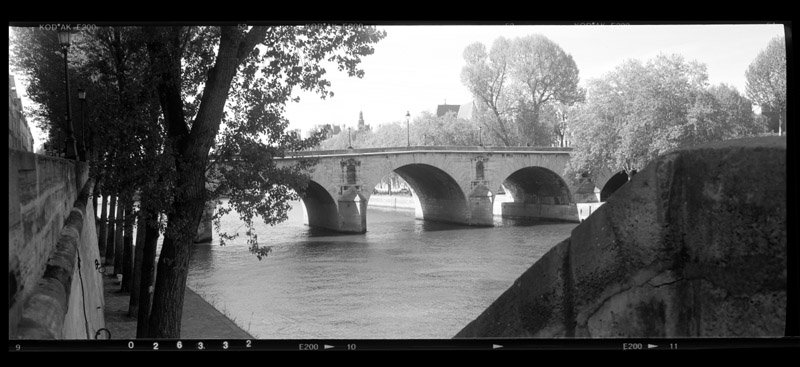 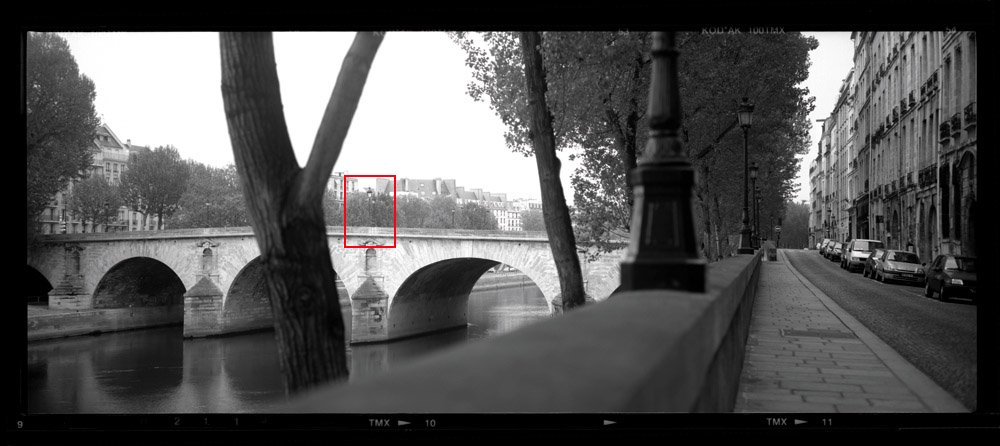 (click to enlarge) 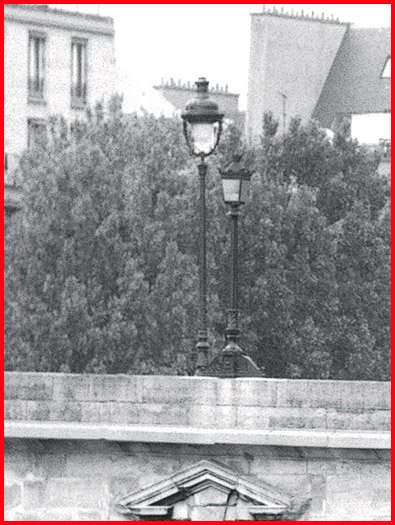 (blow-up of a part of the upper right pict.) |
|
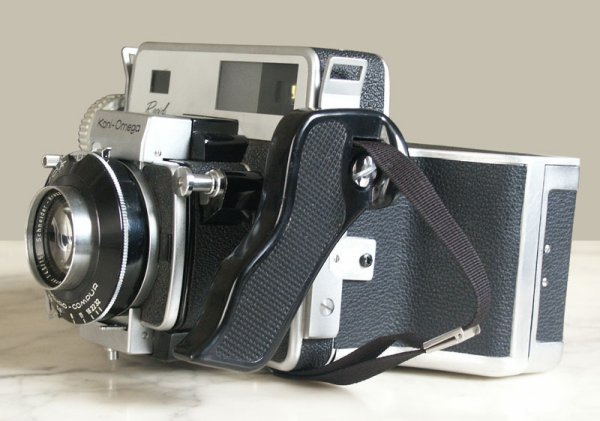
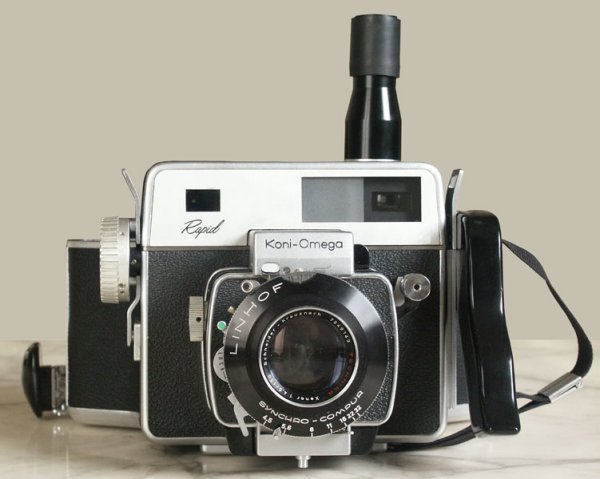
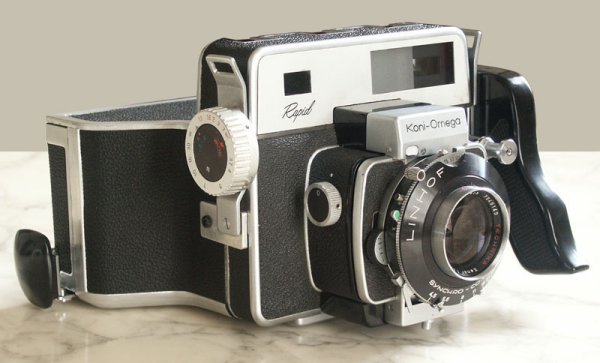
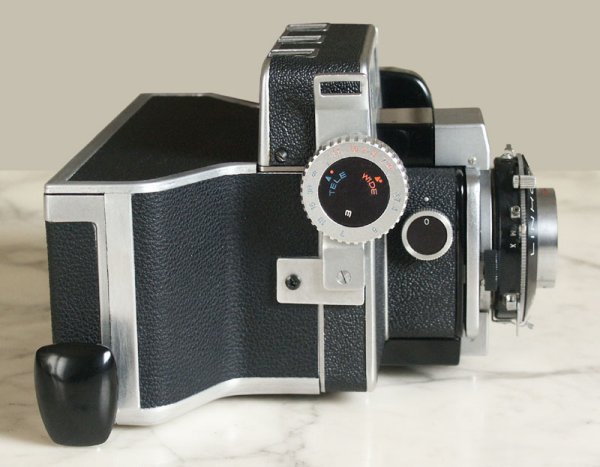
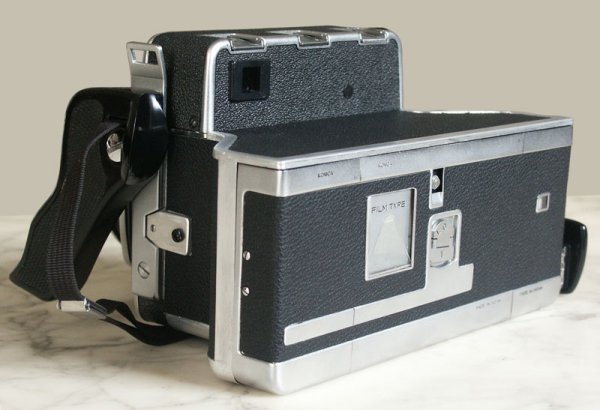
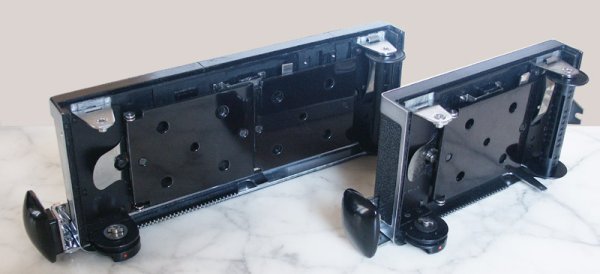
Handmade modification of a Koni-Omega Rapid
for panorama pictures |
pour prise de vues panoramique |
|
January 2003
seeking an average format of occasion I discover an astonishing camera
(Omega 100). After several weeks I bought it and discovered the use of
an alluring, ergonomic and simple
camera. Robust. Designed in passed times but well manuactured (simple,
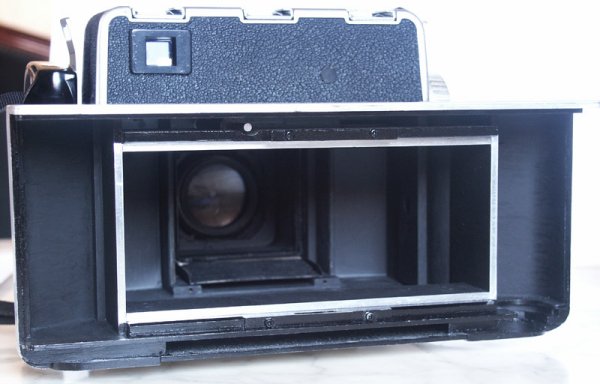
robust mechanism). Tempting also some photographs for tests. The onliest problem I've found was taking hand-help pictures. For realising my panoramic dream of a large panoramic camera for a reasonable price I've considered to study the possibility of a transformation of a Koni-Omega into a panoramic camera. First reflection results, that it can be simple done, two magazines have to be combined, also a lens of a field camera and an intermediate body between the orign Koni-Omega and the new constructed back. I sought two magazines of a Omega 100 at a dealer. I returned to home with three magazines and a Koni-Omega Rapid. After many technical sketches I found out the principles: - Negative size 58 X 143 mm (push transport knob twice), - 5 pictures on rollfilm 120. For the lens I've found an occasion (a 150 mm lens without guarantee) which was appropriate for my budget. For the curious ones, I don't have any sophisticated tools. Files, hack-saw, bi-component adhesive and some sheets of alluminium (1, 2 and 3 mm). That's all. The assembly of the back and the body is carried out by adhesive joining only (except of three screws). The back wasn't a particular problem, sheets of alluminium are stick to maintain the camera unit. The modification of the body was a little more complicated for it has to be adjusted on the Koni-Omega Rapid and also to the back withou any light lacks. All was assembled only by adhesives. The adhesive robustness was been astonishing, exceeds by screwing. For the assembly of the new 150 mm standard lens I've use the same construction way, only the shutter doesn't have now a connection to the orign body release. The parallax finder was more complicated to modify, after several adjustments I decidered thefinder development near less now (between 5 meters and infinite). Shure, it was the only complexed part of the Koni-Omega. Have a look at your Koni-Omega Rapid to see that it has a pressure plate system which retracts just before film moving after releasing the shutter button. I kept this principle, although the button release is not connected any more to the objective. The Koni-Omega Rapid is easy to return in its origin state; only three screws have to be removed! Paris, May 2003, first tests! First impressions:
Resulting, in considering of the big camera construction you don't have problems to take hand-held photos. Greeting to all impassioned Koni-Omega users! Paul-Victor Patrick, Paris, France |
En janvier 2003 cherchant un moyen format d'occasion je découvre un appareil étonnant (Omega 100). Après plusieurs semaines je l'achète et découvre à l'usage un appareil séduisant d'ergonomie et de simplicité. Robuste. Conception d'un autre âge malgré sa date de fabrication (mécanisme simple, robuste).
Séduisantes aussi les photos d'essai. Seul problème l'indispensable cellule à main. Découvrant l'existance par ailleurs de panoramiques de rêve d'un prix largement prohibitif pour mon usage personnel je me penche sur l'Omega pour étudier l'éventualité d'une transformation en panoramique.
Pour cela c'était simple, deux chargeurs acollés, un objectif de chambre, un corps intermédiaire entre l'Omega et le nouveau dos.
J'ai recherché deux chargeurs Omega 100 je suis revenu avec trois chargeurs et un Koni-Omega Rapid. Après de nombreux croquis je tenais le principe:
- Format 58 x 143 mm (on arme deux fois), - 5 vues sur bobine 120. Pour l'objectif un 150 mm d'occasion sans garantie convenait à mon budget. Pour les curieux, je n'ai aucun outillage sophistiqué. Limes, scie à métaux, colle bi-composant et tôles d'alluminium (1, 2 et 3 mm). C'est tout.
L'assemblage du dos et du corps est réalisé par collage uniquement (sauf à trois endroits par vis). Le dos n'a pas posé de problème particulier, tôles collées pour maintenir l'ensemble. Le corps, un peu plus compliqué, puisqu'il doit s'ajuster d'une part sur le Koni-Omega Rapid et d'autre part sur le dos et être étanche à la lumière.
Assemblé par collage. La robustesse par collage est étonnante, la rigidité procurée dépasse largement celle par vissage. Bien prévoir l'ordre de collage des différents éléments. Pour le montage de l'objectif de 150 mm, même principe que l'objectif standard (mais sans poussoir). La modification de la parallaxe utilisant les tiges poussoirs et un palpeur sur un profil a été plus complexe à modifier, après plusieurs réglages j'ai opté pour le choix d'une mise au point proche précise (beaucoup moins entre 5 mètres et l'infini). C'est bien le seul endroit complexe de Koni-Omega.
Regardez le votre pour voir le Koni-Omega Rapid a un press film utilisant le bouton de déclenchement par le biais d'une tige poussoir, j'ai gardé ce principe, bien que le bouton déclencheur ne soit plus relié à l'objectif. Le Koni-Omega Rapid peu revenir à son état d'origine ; trois vis à retirer!
Paris, mois de mai 2003, premiers tests! Premières impressions :
Quelques petits problèmes rencontrées : prises de vue surexposées de 1 à 2 diaph (l'objectif est vieux et l'obturateur trop lent à basse vitesse). Lors des changements de films en extérieur mieux vaut au préalable rechercher un banc publique.
Malgré l'encombrement pas de problème de prise de vue " à mains levées".Bien le bonjour aux passionnés Koni-Omega! Paul-Victor Patrick, Paris |
|
©
Peter
Lanczak Germany/France
last update 11.07.2004 |
Cameras |